You’ve been there, haven’t you? That nagging chill seeping into your bones when the weather turns, and your heating system seems to be taking an extended vacation. You stare at the radiator, willing it to radiate more warmth, but it’s just… not cutting it. Or perhaps you’re in a situation where central heating isn’t an option at all – a workshop, a detached garage, a campsite, or even just a particularly drafty corner of your home. You’ve got pots and pans in your kitchen, a seemingly mundane collection of metalware. But what if you could harness that everyday object, a humble pan, to provide you with a little bit of portable warmth? It sounds a bit like alchemy, doesn’t it? Turning metal into heat. But with a bit of ingenuity and a touch of science, you can, in fact, transform a pan into a surprisingly effective heater. This isn’t about creating a high-output industrial furnace; it’s about creating a localized, manageable source of heat, perfect for small spaces or personal comfort. So, let’s dive into the fascinating world of DIY heating, where your kitchenware becomes your unlikely ally.
Before you start rummaging through your drawers for your trusty skillet, it’s crucial to understand the fundamental principles at play. Heating a space, even a small one, relies on the transfer of thermal energy. You’re not magically creating heat; you’re facilitating its movement from a source to the surrounding air and then to you. There are three primary mechanisms of heat transfer: conduction, convection, and radiation. Understanding how these work will inform your pan-heater project and ensure you’re using your resources effectively and safely.
Conduction: The Direct Transfer
Conduction is the most straightforward form of heat transfer. Imagine touching a hot stove burner. The heat energy directly transfers from the burner to your hand through molecular vibrations. In the context of your pan-heater, conduction will be key in moving heat from your chosen heat source into the pan itself, and then from the pan into the immediate air molecules it contacts. The material of the pan plays a significant role here. Metals are generally excellent conductors of heat, which is why pans are made of them. The denser the metal and the fewer impurities, the better it conducts. Think about how quickly a copper-bottomed pan heats up compared to a ceramic one. This property is essential for efficiently absorbing and distributing heat from your source.
Factors Affecting Conduction in Your Pan
- Material Properties: As mentioned, metals like aluminum, stainless steel, and cast iron are chosen for their conductivity. Aluminum heats up and cools down quickly. Stainless steel is durable but less conductive than aluminum. Cast iron retains heat exceptionally well but takes longer to heat up. Your choice of pan material will directly impact how quickly and evenly your DIY heater will function.
- Thickness of the Pan: A thicker pan will retain more heat but might take longer to reach optimal temperature. A thinner pan will heat up faster but might lose heat more rapidly. You’re looking for a balance that suits your needs.
- Surface Area in Contact with Heat Source: The more of the pan’s surface that is exposed to your heat source, the more efficiently it will absorb heat. This is why a flat-bottomed pan is generally preferred over one with a heavily curved base.
Convection: The Movement of Warm Air
Convection is the process where heat is transferred through the movement of fluids (liquids or gases). When you heat air, it becomes less dense and rises. Cooler, denser air then sinks to take its place, creating a circulating current. This is how a room is heated by a radiator – the hot air rises, circulates around the room, cools, and then descends to be reheated. Your pan-heater will rely on convection to distribute the warmth it generates into your immediate environment. The pan, once heated, will warm the air directly above and around it, and this warm air will then naturally rise and spread.
Harnessing Convection for Your Heater
- Airflow is Key: To maximize convection, you want unimpeded airflow around your heated pan. Placing it in a confined space where air cannot circulate will significantly reduce its effectiveness. Allowing air to flow underneath and around the pan is crucial for efficient warm air distribution.
- The Role of Pan Design: While a flat bottom is good for conduction, the shape of the pan can also influence convection. A wider, shallower pan will expose more surface area to the air, promoting faster heat dissipation. A deeper pan might create a more concentrated updraft of warm air.
Radiation: The Invisible Waves
Radiation is the transfer of heat through electromagnetic waves, like the warmth you feel from the sun or a campfire. Objects that are hot emit infrared radiation. Your heated pan will also radiate heat directly into the surrounding space. This is a silent but significant way your pan-heater will contribute to your comfort, especially if you are positioned directly in front of it.
Maximizing Radiant Heat
- Surface Properties: The color and texture of the pan’s surface can influence how much radiation it emits. Darker, matte surfaces tend to be better radiators than shiny, polished ones. This is why a well-seasoned cast iron pan, with its slightly matte black finish, is excellent at radiating heat.
- Temperature Difference: The hotter the pan, the more infrared radiation it will emit. This is a direct relationship: the greater the temperature difference between the pan and its surroundings, the more radiant heat will be transferred.
In exploring the fascinating concept of how a pan can serve as a heater, one can gain deeper insights by reading a related article on the topic. This article delves into the science behind heat conduction and the materials that enhance a pan’s ability to distribute heat evenly. For more information, you can check out the article at Freaky Science.
Choosing Your Heat Source: Powering Your Pan
This is where the “turning a pan into a heater” concept gets interesting. You need a way to get that pan hot in the first place. The method you choose will depend entirely on your circumstances, available resources, and safety considerations. You’re not going to be plugging your pan into an electrical outlet (unless it’s a specific, designed appliance, which isn’t the DIY spirit here!). Instead, you’ll be looking for alternative heat sources that can safely transfer their thermal energy to your pan.
Fuel-Based Heat Sources: The Traditional Approach
These are the classic methods for generating heat, often found in camping or emergency situations. They involve the controlled combustion of flammable materials.
Camp Stoves and Portable Burners
- Propane or Butane Stoves: These are widely available and relatively safe when used correctly. They provide a direct flame that can quickly heat your pan. Ensure you are in a well-ventilated area and that the stove is stable.
- Alcohol Stoves: These are simpler and often lighter, making them popular for backpacking. They use denatured alcohol as fuel and produce a clean-burning flame.
- Solid Fuel Tablets: Small, compressed fuel tablets can provide a decent amount of heat for a short period. They are very portable but may not be ideal for sustained heating.
Open Fires and Wood Burning
- Controlled Fire Pit: If you have access to a safe and legal outdoor space, a small, controlled fire can be used. You would place your pan above the flames, not directly in them, to avoid scorching and uneven heating. This requires careful management and a sturdy support structure.
- Wood-Burning Stove (if accessible): If you have access to a wood-burning stove, the top surface can serve as a direct heat source for your pan. Again, ensure the pan is stable and positioned correctly.
Other Potential Heat Sources: Unexpected Innovations
Beyond traditional flames, there are other ways to generate heat that can be adapted for your pan-heater project.
Heated Water or Other Fluids
- Hot Water Immersion: If you have access to a large container of very hot water (e.g., from a kettle or a thermos), you could partially immerse the base of your pan in it. This will transfer heat through conduction. The effectiveness will depend on how long the water stays hot and the size of the pan’s contact area.
- Heated Sand or Rocks: In certain survival scenarios, heating sand or rocks in a fire and then placing the pan on top of the heated material can provide a sustained, albeit less intense, heat source. This relies on the material’s ability to retain and slowly release heat.
Chemical Heat Packs (Limited Application)
- Disposable Heat Packs: While not ideal for sustained heating, you could theoretically place a few activated chemical heat packs underneath a shallow pan. The heat generated would be minimal, but it might provide a small amount of localized warmth for a very short duration. This is more of a novelty than a practical solution for significant heating.
Selecting the Right Pan: Your Thermal Conductor
Not all pans are created equal when it comes to acting as a makeshift heater. The material, thickness, and even the shape of your pan will play a crucial role in its efficiency and safety as a heat source. You’re looking for a pan that can absorb heat readily, distribute it evenly, and retain it for a reasonable amount of time.
The Best Materials for the Job
- Cast Iron: This is often considered the king of retained heat. Once a cast iron pan is hot, it stays hot for a long time, radiating warmth steadily. Its dense structure means it absorbs heat thoroughly and distributes it evenly across its surface. The slightly rough, matte surface is also excellent at radiating heat. The downside is that it takes longer to heat up and is heavy.
- Carbon Steel: Similar to cast iron in many ways, carbon steel heats up a bit faster and is lighter. It also has excellent heat retention and radiation properties, especially when seasoned. It’s a great all-around choice for a DIY heater.
- Heavy-Gauge Aluminum (Anodized or Hard-Anodized): While aluminum heats up very quickly, it also cools down faster than cast iron or carbon steel. However, thicker, anodized aluminum pans can still be effective. They offer good conductivity for rapid heat absorption and can be less prone to sticking if you’re using a method that involves something directly in the pan (though this is generally not the case for a heater).
- Stainless Steel (with a Clad Bottom): Pure stainless steel isn’t the best conductor. However, many good quality stainless steel pans have a core of aluminum or copper sandwiched between the stainless steel layers (clad bottom). This composite construction significantly improves heat conductivity and distribution, making them a viable option.
Pans to Potentially Avoid (or Use with Caution)
- Thin, Lightweight Aluminum or Copper Pans: These will heat up very quickly but will also lose heat just as fast. They are unlikely to provide sustained warmth.
- Non-Stick Coated Pans: The non-stick coating can be damaged by excessive or uneven heat, especially if you’re using a direct flame. High temperatures can also cause some non-stick coatings to release fumes. It’s generally safer to avoid these for DIY heating applications.
- Ceramic or Glass Pans: These are poor conductors of heat. While they might get warm, they won’t efficiently transfer heat to the air. They are also prone to thermal shock and cracking if subjected to rapid temperature changes.
- Pans with Thin or Warped Bases: Uneven heating or a lack of good contact with the heat source will lead to inefficient performance.
The Influence of Pan Shape and Size
- Flat-Bottomed Pans: These are ideal because they offer the largest, most consistent contact area with your heat source. This maximizes heat absorption through conduction.
- Shallow, Wide Pans (e.g., Skillets, Sauté Pans): These expose more surface area to the surrounding air, promoting faster convective heat transfer. The wider surface also allows for more radiant heat to escape.
- Deeper Pans (e.g., Saucepans, Dutch Ovens): While a Dutch oven can hold a lot of heat, its depth can sometimes create a more concentrated updraft, which might be beneficial for heating a very small, localized area directly above it. However, for general room heating, a shallower pan might be more effective at spreading warmth.
Constructing Your Pan Heater: Putting It All Together
Now for the exciting part – assembling your DIY pan heater. This is where creativity and practicality meet. The construction itself is usually minimal, focusing on safe positioning and maximizing the pan’s heat-emitting capabilities.
Method 1: Direct Heat Source (e.g., Camp Stove)
This is perhaps the most straightforward and common method.
Step-by-Step Assembly
- Choose Your Pan: Select a suitable pan (e.g., cast iron skillet, carbon steel pan).
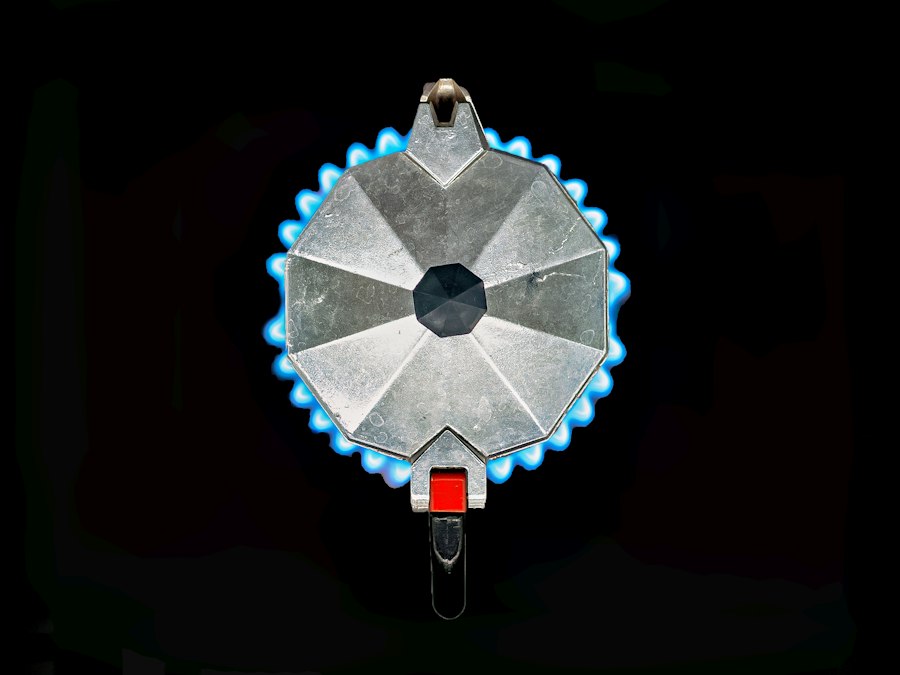
- Select Your Heat Source: Set up your portable camp stove on a stable, non-flammable surface in a well-ventilated area. Ensure the stove is level and secure.
- Position the Pan: Place the pan directly on the burner of the camp stove. Ensure the base of the pan has good contact with the heat source.
- Ignite the Heat Source: Light your camp stove according to its manufacturer’s instructions.
- Adjust the Flame: Start with a low to medium flame. You want to heat the pan gradually to avoid scorching or damaging it. You’re aiming for a consistent, comfortable warmth, not an inferno.
- Monitor and Maintain: Keep an eye on the flame and the pan. The pan will begin to warm up. As it heats, it will start to radiate heat and warm the air around it through convection.
Safety Considerations for Direct Heat
- Ventilation is Paramount: Never use fuel-burning appliances indoors without adequate ventilation. Carbon monoxide poisoning is a serious risk.
- Stable Surface: Ensure the heat source and the pan are on a stable, level surface that won’t tip over.
- Clearance: Keep flammable materials (curtains, paper, bedding) well away from the heat source and the heated pan.
- Never Leave Unattended: A DIY heater, especially one involving open flames, should never be left unattended.
- Cooling Down: Allow the pan and the heat source to cool down completely before handling or storing them.
Method 2: Indirect Heat Source (e.g., Heated Rocks or Water)
This method is more about creating a sustained, lower-temperature heat source, often used when direct flames are not desired or practical.
Step-by-Step Assembly
- Gather Your Materials: You’ll need your chosen pan and your indirect heat source. For heated rocks, this means carefully heating smooth, dense rocks (avoid porous ones that can explode) in a fire pit until they are hot. For heated water, you’ll need a large container of very hot water.
- Prepare the Heat Source:
- Rocks: Carefully remove the heated rocks from the fire using tongs and place them on a non-flammable surface.
- Water: Have your container of hot water ready.
- Position the Pan: Place your pan on top of the heated rocks or partially immerse its base in the hot water. Ensure the pan is stable and won’t tip.
- Allow for Heat Transfer: The heat will transfer from the rocks or water into the pan through conduction. This process will be slower and less intense than direct flame heating.
- Replenish as Needed: As the rocks cool or the water loses its heat, you may need to replenish them to maintain a consistent temperature.
Safety Considerations for Indirect Heat
- Handling Hot Materials: Use extreme caution when handling hot rocks or containers of hot water. Tongs, heat-resistant gloves, and sturdy containers are essential.
- Stable Placement: Ensure the pan is securely placed on the rocks or that the container of water is stable and won’t spill.
- Steam and Moisture: Be mindful of steam, especially when using hot water, and ensure adequate ventilation to prevent excessive moisture build-up.
- Rock Selection: As mentioned, use dense, smooth rocks that have been tested for their ability to withstand heat without exploding.
In exploring the fascinating concept of how a pan can become a heater, you might find it interesting to read more about the science behind heat conduction and its practical applications in cooking. This process not only enhances our culinary skills but also demonstrates fundamental principles of physics in everyday life. For a deeper understanding, check out this related article on the topic here.
Optimizing Your Pan Heater for Maximum Comfort
| Step | Process | Explanation | Key Metric |
|---|---|---|---|
| 1 | Heat Source Activation | Energy from the stove or heating element is turned on. | Power Input (Watts) |
| 2 | Heat Transfer to Pan | Heat moves from the burner to the pan’s base via conduction. | Thermal Conductivity (W/m·K) |
| 3 | Pan Surface Temperature Rise | Pan surface temperature increases as it absorbs heat. | Temperature (°C) |
| 4 | Heat Distribution in Pan | Heat spreads evenly across the pan’s surface. | Heat Distribution Uniformity (%) |
| 5 | Pan Acts as Heater | Pan radiates and transfers heat to the food or contents. | Heat Transfer Rate (Watts) |
Simply placing a hot pan in a room won’t guarantee optimal comfort. A few clever adjustments and considerations can significantly enhance the effectiveness of your DIY heater, ensuring you get the most warmth out of your efforts.
Enhancing Airflow and Distribution
- Create a Draft: You want the warm air to circulate. If your pan is against a wall, try to position it so that air can flow around it. If you’re using it in a corner, leaving a small gap can make a difference.
- Elevate the Pan: Placing the pan on a stable, heat-resistant object (like a few bricks or a sturdy trivet) can allow cooler air to flow underneath, promoting better convective currents and more even heating of the pan itself. This is especially useful if you’re placing it on a cold floor.
- Use a Fan (with Caution): For larger spaces or to distribute heat more rapidly, you could strategically place a small, low-powered fan to gently push the warm air generated by the pan around the room. Crucially, ensure the fan is placed at a safe distance from the pan and heat source to avoid any risk of overheating the fan itself or creating a fire hazard. This is an advanced technique and requires careful consideration of safety.
Utilizing Reflective Surfaces
- Radiant Heat Focus: Since your pan will also radiate heat, you can strategically use reflective surfaces to direct this warmth towards where you are.
- Aluminum Foil Shield: You can carefully prop up sheets of aluminum foil behind and to the sides of the pan (ensuring they don’t touch the heat source or pan directly). These will act as reflectors, bouncing the infrared radiation back into the occupied space, effectively increasing the perceived warmth. Be sure to create a stable structure for the foil that won’t collapse.
Managing Heat Output and Duration
- Gradual Heating: As mentioned in the construction phase, it’s better to heat your pan gradually. This ensures more even heat distribution and reduces the risk of hot spots or damage.
- Fuel Management: If you’re using a fuel-based heat source, manage your fuel supply carefully. For sustained warmth, you’ll need to be prepared to refuel or replenish your heat source.
- Pan Retention: A well-heated cast iron or carbon steel pan will retain heat for a significant time after the heat source is removed. This can be useful for providing a gentle warmth as the pan slowly cools.
The Importance of Safety: Your Top Priority
This article is about ingenuity and resourceful heating, but safety must always be your absolute top priority. Turning a pan into a heater, especially when using fuel-based heat sources, carries inherent risks. It’s crucial to be aware of these risks and take all necessary precautions.
Fire Hazards: The Most Obvious Risk
- Flammable Materials: Always maintain a significant clearance between your DIY heater and any flammable materials. This includes curtains, rugs, paper, bedding, and even loose clothing.
- Stable Setup: Ensure your heat source and pan are on a stable, non-flammable surface. A toppled stove or pan can quickly start a fire.
- Extinguishing Properly: Have a fire extinguisher or a bucket of water readily accessible. Know how to use them. Never attempt to extinguish a grease fire with water.
- “Out Like a Light” Rule: If you leave the area, even for a short time, always ensure your heat source is completely extinguished and the pan has cooled down.
Carbon Monoxide Poisoning: The Silent Threat
- Ventilation is Non-Negotiable: When using any fuel-burning appliance (camp stoves, portable heaters, even candles), you absolutely must ensure adequate ventilation. This means opening windows or doors to allow fresh air to circulate.
- Symptoms of CO Poisoning: Be aware of the symptoms of carbon monoxide poisoning: headaches, dizziness, nausea, weakness, confusion, and chest pain. If you experience these symptoms, leave the area immediately and seek fresh air.
- CO Detectors: If you plan on using DIY heating methods regularly, consider investing in a carbon monoxide detector for the space.
Burns and Scalds: The Direct Danger
- Hot Surfaces: The pan and its surroundings will become extremely hot. Always assume anything near the heat source is hot and use caution.
- Handling: Use heat-resistant gloves or oven mitts when handling the pan or moving it.
- Children and Pets: Keep children and pets well away from the DIY heater. Their curiosity can lead to serious accidents.
Material Degradation and Fumes
- Overheating: Overheating certain pan materials or coatings can cause them to degrade, potentially releasing harmful fumes. Stick to suitable pan materials and avoid extreme temperatures.
- Non-Stick Coatings: As mentioned, avoid using non-stick pans as they can be damaged and release fumes when overheated.
By understanding these principles, choosing your materials wisely, constructing your setup with care, optimizing for comfort, and most importantly, prioritizing safety above all else, you can transform a common household item – a pan – into a surprisingly effective source of localized warmth. It’s a testament to human ingenuity, turning the everyday into something extraordinary when the need arises. Remember, this is a supplemental heating solution, not a replacement for a properly installed and maintained heating system. But in a pinch, or for specific applications, your humble pan can be a surprisingly powerful ally against the chill.
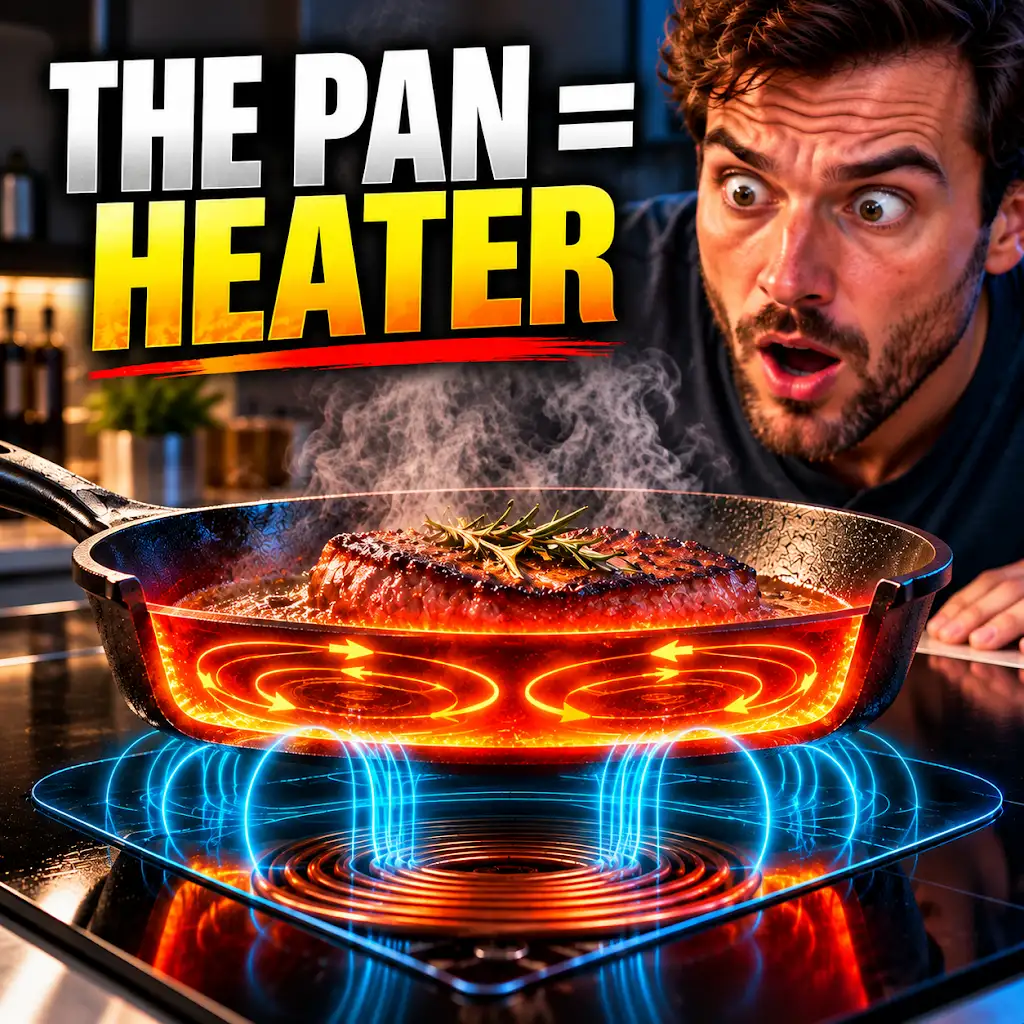
The Pan Is the Heater: How Induction Cooking Really Works
FAQs
What is the article “How the Pan Becomes the Heater” about?
The article explains how a regular cooking pan can be used as a makeshift heater in emergency situations.
How does a pan become a heater?
By placing a few tea light candles in the pan and lighting them, the pan can generate enough heat to warm up a small area.
Is it safe to use a pan as a heater?
While using a pan as a heater can provide temporary warmth, it is important to exercise caution and ensure proper ventilation to prevent carbon monoxide poisoning.
What are some tips for using a pan as a heater?
Some tips include placing the pan on a stable surface, keeping flammable materials away, and never leaving the candles unattended.
Are there any alternatives to using a pan as a heater?
Yes, there are safer and more efficient options for heating a space, such as using a space heater or dressing warmly in layers.