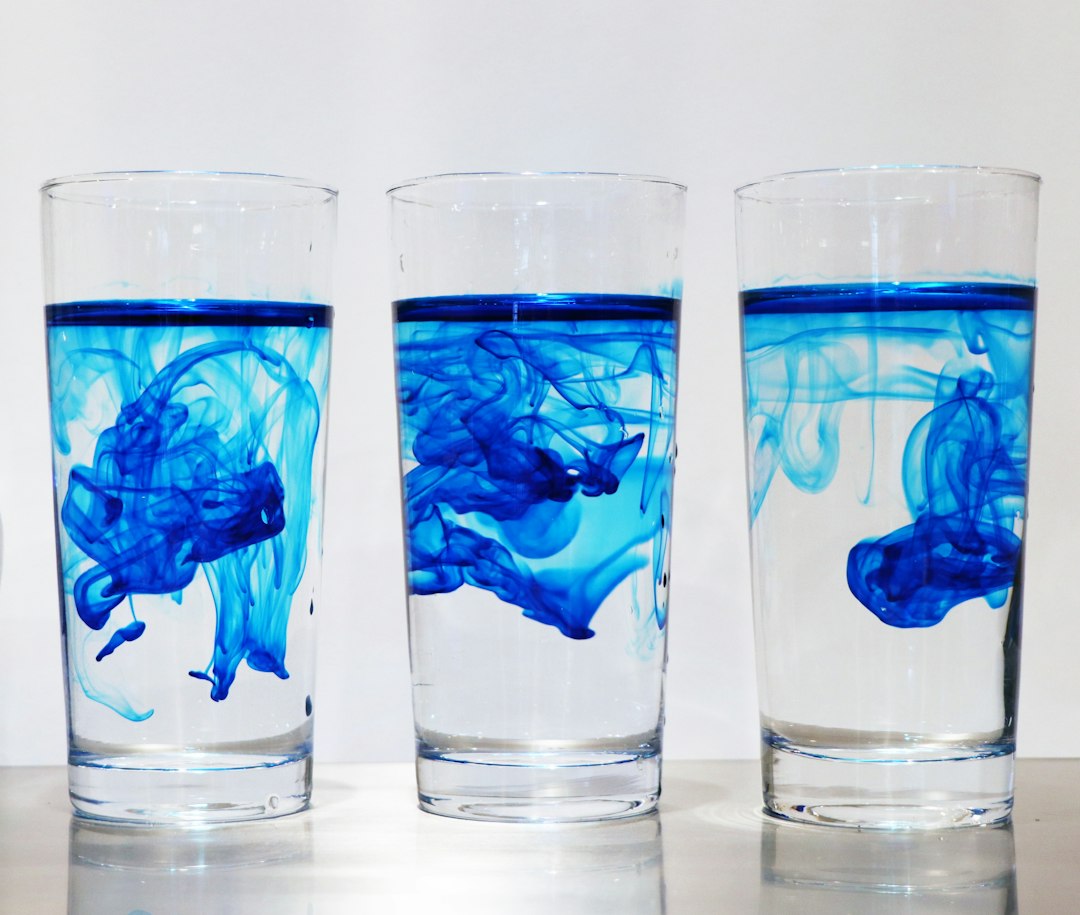
The world around us is a constant source of wonder, brimming with scientific principles waiting to be discovered. Many people believe science is confined to sterile laboratories and complex textbooks, but the truth is, the most fascinating experiments often require nothing more than a few common household items and a curious mind. Engaging in hands-on science at home is not only fun but also a powerful way to foster a deeper understanding of the natural world and inspire a lifelong love of learning. These experiments are designed to be accessible, safe, and demonstrative of fundamental scientific concepts, making them perfect for individuals of all ages looking to inject a bit of scientific adventure into their daily lives.
The beauty of home-based science lies in its immediacy. Rather than waiting for a school project or a special outing, these activities can be undertaken during a quiet afternoon, a rainy weekend, or even as a spontaneous burst of curiosity. They transform ordinary moments into opportunities for observation, prediction, and experimentation. By demystifying scientific processes, these experiments empower individuals to see the science behind everyday phenomena, from the way a balloon inflates to how oil and water interact. This article will explore a variety of engaging and educational science experiments that can be easily replicated at home, covering topics such as chemistry, physics, and biology, all while emphasizing safety and the joy of discovery.
The Magic of Molecules: Kitchen Chemistry Adventures
The kitchen is a treasure trove of scientific potential, offering an array of ingredients that can be transformed into exciting chemical reactions. Many common food items possess properties that, when combined or manipulated, reveal fascinating chemical principles. These experiments are often visually striking and provide tangible demonstrations of concepts like acids and bases, chemical reactions, and the properties of matter.
Unleashing the Volcano: A Classic Acid-Base Reaction
One of the most iconic home science experiments, the baking soda volcano, is a perfect introduction to acid-base reactions. It’s simple to set up and delivers a dramatic visual payoff.
Materials and Setup:
- Ingredients: Baking soda (sodium bicarbonate), vinegar (acetic acid), dish soap, red food coloring (optional).
- Tools: A small bottle or cup, a tray or shallow dish to contain the eruption, modeling clay or playdough to shape a volcano around the bottle (optional).
The Science Behind the Eruption:
When baking soda, a base, comes into contact with vinegar, an acid, a chemical reaction occurs. This reaction produces carbon dioxide gas (CO2). The equation for this reaction is: NaHCO3 (baking soda) + CH3COOH (vinegar) → CH3COONa (sodium acetate) + H2O (water) + CO2 (carbon dioxide). The rapid release of carbon dioxide gas creates bubbles. Adding a few drops of dish soap to the mixture traps these gas bubbles, creating a foamy, volcano-like eruption. The food coloring, if used, adds to the visual spectacle. The speed and intensity of the eruption can be influenced by the temperature of the vinegar and the ratio of baking soda to vinegar. For a more sustained eruption, a slightly warmer vinegar can be used. Experimenting with different amounts of baking soda and vinegar can also lead to varying eruption sizes, allowing for exploration of stoichiometry.
Dancing Raisins: Buoyancy and Gas Power
This experiment demonstrates the principles of buoyancy and how gases can affect density. It’s a fun and visually engaging way to illustrate concepts often discussed in physics.
Materials and Setup:
- Ingredients: A clear glass or jar, clear soda (like Sprite or 7-Up), and raisins.
- Tools: None required beyond the ingredients and a suitable container.
The Science of the Dance:
The carbonation in the clear soda is the key to this experiment. Carbon dioxide gas (CO2) molecules are dissolved in the liquid. When the raisins are dropped into the soda, their rough surfaces provide nucleation sites where the dissolved CO2 can readily form bubbles. These CO2 bubbles attach themselves to the raisins, making them less dense than the surrounding liquid. As a result, the carbonated raisins, now buoyant, rise to the surface. At the surface, the CO2 bubbles pop and escape into the air. Once the bubbles are gone, the raisins become denser again and sink back down into the soda. This cycle of bubbling, rising, popping, and sinking repeats, creating the illusion of dancing raisins. The type of soda can also play a role; clear sodas are preferred to easily observe the raisin’s movement and the bubble formation. Diet sodas can sometimes work even better due to the different types of sweeteners used, which may not create as much foam and allow for a clearer view of the raisins’ motion.
Oobleck: The Non-Newtonian Wonder
Oobleck is a fascinating substance that defies conventional liquid and solid definitions, offering a tangible experience of a non-Newtonian fluid.
Materials and Setup:
- Ingredients: Cornstarch and water.
- Tools: A bowl or container, a spoon for mixing.
Understanding the Fluidity:
Oobleck is a shear-thickening fluid, meaning its viscosity changes depending on the stress applied to it. When you apply gentle pressure, like slowly dipping your finger into the mixture, it behaves like a liquid, allowing your finger to sink in. However, if you punch it or try to grab it quickly, the cornstarch particles are forced together, creating a temporary solid-like structure that resists the force. The science behind this lies in the cornstarch granules. In water, these granules are suspended. When force is applied, the water is squeezed out from between the granules, causing them to pack together tightly, creating a solid-like resistance. When the force is removed, the water can flow freely again, and the mixture reverts to its liquid state. The ratio of cornstarch to water is crucial for achieving the desired effect. A common starting point is a 2:1 ratio of cornstarch to water, but this can be adjusted to achieve different consistencies. Adding food coloring can make the experiment even more visually appealing, though it can also slightly alter the consistency.
If you’re looking for engaging and educational activities to spark curiosity in science, you might find inspiration in the article on everyday science experiments. This resource provides a variety of simple yet fascinating experiments that can be conducted at home, making science accessible and fun for everyone. To explore these experiments and ignite your scientific creativity, check out the article here: Everyday Science Experiments.
The Power of Perception: Physics Experiments at Home
Physics governs the fundamental laws of the universe, and many of its principles can be elegantly demonstrated with everyday objects. These experiments often explore forces, motion, light, and sound in ways that are both educational and captivating.
The Incredible Shrinking Balloon: Air Pressure and Temperature
This experiment vividly illustrates the relationship between temperature and the volume of gases, a cornerstone of gas laws.
Materials and Setup:
- Ingredients: A plastic bottle (empty), a balloon, hot water, cold water.
- Tools: A heat-resistant container for the hot water (e.g., a large bowl or sink).
The Science of Expansion and Contraction:
Gases expand when heated and contract when cooled. In this experiment, the air inside the balloon is the gas. When the bottle containing the balloon is placed in hot water, the air molecules inside the bottle gain kinetic energy, move faster, and spread further apart. This increased volume of air pushes outwards on the balloon, causing it to inflate. Conversely, when the bottle is transferred to cold water, the air molecules lose kinetic energy, slow down, and move closer together. This decrease in the volume of air inside the bottle creates lower pressure, and the external atmospheric pressure pushes on the balloon, causing it to deflate or even be sucked into the bottle. This phenomenon is a practical demonstration of Charles’s Law, which states that at constant pressure, the volume of an ideal gas is directly proportional to its absolute temperature. The rate of inflation or deflation can also be observed, showing how quickly temperature changes can affect gas volume.
Surface Tension Secrets: The Magic of Water’s Skin
Surface tension is a remarkable property of liquids that allows for seemingly impossible feats, all observable with simple household items.
Materials and Setup:
- Ingredients: A bowl of water, black pepper, liquid dish soap.
- Tools: None required beyond the ingredients and a bowl.
Unraveling the Surface:
Water molecules are attracted to each other, a phenomenon called cohesion. At the surface of the water, these molecules are pulled downwards and sideways by neighboring water molecules, but not upwards. This creates a net inward pull, resulting in a “skin” on the surface of the water, known as surface tension. When black pepper is sprinkled on the surface, it floats because its individual particles are too light to break through this surface tension. When a small amount of dish soap is added to the center of the water, it breaks the surface tension in that area. The water molecules surrounding the spot where the soap was added are still held together by cohesion. They are then pulled outwards by the surrounding water, dragging the pepper flakes with them and creating the dramatic outward “explosion” of pepper. This experiment highlights how even seemingly invisible forces like surface tension can have observable effects and how introducing a surfactant (like dish soap) can dramatically alter these properties.
The Penny Brightener: Oxidation and Chemical Change
This experiment showcases a common chemical process: oxidation, and how it can be reversed with the right chemical agent.
Materials and Setup:
- Ingredients: Pennies (preferably older ones), white vinegar, salt, a small bowl or dish.
- Tools: A spoon for stirring.
The Chemistry of Cleaning:
Older pennies often develop a dull, greenish-brown coating called patina, which is a result of oxidation. Copper, the main component of pennies, reacts with oxygen and other substances in the environment to form copper oxides and carbonates. The vinegar, being an acid, and the salt, which helps to accelerate the reaction, work together to remove this oxidized layer. The acetic acid in vinegar reacts with the copper oxide, breaking it down. The salt acts as a catalyst, increasing the rate of the chemical reaction. When the pennies are left in the vinegar-salt solution, the acid dissolves the tarnish, revealing the shiny copper underneath. The process is essentially a reduction-oxidation (redox) reaction where the copper in the tarnish is oxidized and then reduced back to its metallic state, or dissolved by the acidic solution. The longer the pennies are left in the solution, the shinier they will become, and for too long, they can start to be eroded by the acid. It’s a great visual demonstration of how chemical reactions can alter the appearance of materials.
Biological Wonders: Exploring Life at Home
Even without a microscope, many fascinating biological principles can be observed and experimented with using readily available materials. These experiments focus on the growth, behavior, and characteristics of living organisms and their environments.
The Sprouting Seed: Germination and Growth Factors
Witnessing a seed transform into a plant is one of nature’s most inspiring processes, and it can be easily observed at home.
Materials and Setup:
- Ingredients: Fast-germinating seeds (like beans, radishes, or cress), cotton balls or paper towels, water, clear plastic bags or jars.
- Tools: A sunny windowsill or a source of light.
The Miracle of Germination:
Seed germination is the process by which a plant embryo within a seed emerges and begins to grow. For germination to occur, several conditions must be met: moisture, oxygen, and the appropriate temperature. In this experiment, the cotton balls or paper towels provide moisture, the air trapped in the bag or jar provides oxygen, and a room temperature environment is usually sufficient. The seed absorbs water, which activates enzymes within the seed. These enzymes begin to break down stored food reserves, providing energy for the embryo to grow. The radicle, the embryonic root, is usually the first to emerge, anchoring the seedling and absorbing more water and nutrients. Following the radicle, the shoot emerges, carrying the first leaves. Sunlight is essential for photosynthesis, the process by which the plant converts light energy into chemical energy for continued growth. By varying the conditions (e.g., placing one bag in the dark, one without water), one can observe the importance of each factor for successful germination and growth. This experiment provides a fundamental understanding of plant life cycles and the environmental factors that influence them.
The Moldy Marvel: The World of Fungi
While perhaps less aesthetically pleasing, observing mold growth is a powerful way to understand decomposition and the life cycles of fungi.
Materials and Setup:
- Ingredients: Slices of bread (different types can be used for comparison), small resealable plastic bags, water.
- Tools: A dark, relatively warm place.
The Fungal Frontier:
Mold is a type of fungus, a microorganism that plays a crucial role in decomposition. Mold reproduces by releasing tiny spores into the air. When these spores land on a suitable surface, like a slice of bread, and find the right conditions – moisture, food source, and a favorable temperature – they begin to grow. The bread provides nutrients for the mold. The moisture, which can be introduced by lightly misting the bread with water or by the humidity in the environment, is essential for the mold’s growth. Different types of bread may support different types of mold growth due to variations in their ingredients and preservatives. By observing the progression of mold growth on different bread samples over several days, one can witness the colonization of the surface, the development of different colors and textures, and the eventual breakdown of the bread. This experiment highlights the ubiquitous nature of mold and its importance as a decomposer in ecosystems, breaking down organic matter and recycling nutrients. It also serves as a reminder of the importance of proper food storage to prevent spoilage.
Growing Crystals: The Beauty of Solid Structures
The formation of crystals is a visually stunning demonstration of how molecules arrange themselves into ordered, repeating patterns.
Materials and Setup:
- Ingredients: Sugar or salt, water, a clean jar or glass.
- Tools: A spoon for stirring, string or a pipe cleaner, a pencil or stick to suspend the string/pipe cleaner.
The Art of Crystallization:
Crystals form when dissolved substances (solutes) precipitate out of a solution and arrange themselves into a highly ordered, repeating three-dimensional structure. In this experiment, either sugar or salt is dissolved in hot water to create a supersaturated solution – a solution that holds more solute than it normally could at that temperature. As the solution cools, its capacity to hold the dissolved substance decreases. The excess solute molecules then begin to attach themselves to nucleation sites, which can be tiny imperfections in the container or even dust particles. They then arrange themselves in a specific geometric pattern determined by the chemical structure of the substance. The string or pipe cleaner acts as a scaffold for the crystals to grow on. Over time, as water evaporates from the solution, more solute molecules will crystallize, leading to the formation of visible crystals. The size and shape of the crystals depend on factors such as the rate of cooling, the purity of the solution, and the presence of impurities. This experiment demonstrates fundamental principles of solubility, saturation, and the process of crystallization, which is responsible for the formation of gems, minerals, and even snowflakes.
Creative Chemistry: Fun with Polymers and Solutions
Beyond the kitchen, various everyday materials can be used to explore the fascinating world of polymers and solutions, revealing how the structure of matter influences its properties.
Slime Time: The Wonders of Polymers
Making slime is a popular and engaging activity that provides a hands-on introduction to polymers and cross-linking.
Materials and Setup:
- Ingredients: White school glue (PVA glue), borax powder, water, food coloring (optional).
- Tools: Two bowls, a measuring cup and spoons, a stirring stick.
The Science of Stretchiness:
White school glue is made of long, chain-like molecules called polymers, specifically polyvinyl acetate (PVA). Borax powder, when dissolved in water, forms borate ions. These borate ions act as cross-linkers, connecting the long PVA polymer chains together. When the borax solution is added to the glue, it forms chemical bonds between the polymer chains, creating a network structure. This network traps water molecules within it, giving the slime its characteristic stretchy, gooey texture. The more cross-linking that occurs, the firmer and less sticky the slime will be. Conversely, if there isn’t enough cross-linking, the slime will be too runny. By adjusting the ratio of borax solution to glue, one can create slime with different consistencies. The food coloring adds a visual element, allowing for personalization and exploration of color mixing. This experiment is a fantastic introduction to the concept of polymers and how manipulating their structure can lead to drastically different material properties.
Homemade Lava Lamp: Density and Convection Currents
This DIY lava lamp visually demonstrates the principles of density and convection, showing how liquids with different densities interact and move.
Materials and Setup:
- Ingredients: A clean, clear bottle or jar, vegetable oil, water, food coloring, Alka-Seltzer tablets.
- Tools: None required beyond the ingredients and a container.
The Colorful Currents:
Oil and water do not mix because water molecules are polar (have a slight electrical charge) and oil molecules are non-polar. This difference in polarity means they are not attracted to each other. As a result, oil is less dense than water and will float on top. When food coloring is added to the water, it colors the water but not the oil. The Alka-Seltzer tablet reacts with the water to produce carbon dioxide gas. These gas bubbles attach themselves to the colored water, making it less dense than the surrounding oil. The buoyant water-oil-gas mixture rises to the top of the bottle. At the surface, the gas bubbles pop and escape, and the now denser colored water sinks back down through the oil. This continuous cycle of rising and sinking creates the mesmerizing “lava lamp” effect. The rate of the bubbles and the movement can be observed, showcasing the dynamic interplay between density and buoyancy, driven by the chemical reaction of the Alka-Seltzer.
Invisible Ink: The Power of pH Indicators
This experiment uses everyday substances to reveal a hidden message, demonstrating the sensitivity of certain compounds to changes in pH.
Materials and Setup:
- Ingredients: Lemon juice, white paper, a heat source (e.g., a lamp or an iron set to low heat).
- Tools: A cotton swab or paintbrush for writing.
The Secret Message Revealed:
Lemon juice is acidic, meaning it has a low pH. When you write with lemon juice on paper, the acid weakens the paper’s fibers. When you apply heat to the paper, the acid oxidizes (burns) faster than the paper itself. This oxidation process causes the lemon juice to turn brown, making the invisible message visible. The heat provides the energy needed for the chemical reaction to occur. Different acidic substances will produce different colored inks when heated, and even different types of paper can affect the outcome. This experiment is a simple yet effective illustration of how chemical reactions can be triggered by heat and how acidic substances behave differently from neutral or alkaline substances under thermal stress. It’s a playful way to introduce the concept of chemical change and the importance of carefully selected ingredients for specific effects.
If you’re interested in exploring the fascinating world of science through hands-on activities, you might want to check out a related article that offers a variety of engaging experiments. These experiments are perfect for both kids and adults, making science fun and accessible for everyone. You can find more information and ideas for your next project by visiting Freaky Science, where you’ll discover a wealth of resources to ignite your curiosity and creativity.
Beyond the Basics: Engaging with the Natural World
| Experiment | Materials Needed | Duration | Age Group | Scientific Concept |
|---|---|---|---|---|
| Volcano Eruption | Baking soda, vinegar, dish soap, red food coloring | 10 minutes | 6-12 years | Chemical reaction (acid-base reaction) |
| Invisible Ink | Lemon juice, cotton swab, white paper, heat source | 15 minutes | 8-14 years | Oxidation and heat reaction |
| Density Tower | Honey, dish soap, water, vegetable oil, rubbing alcohol, food coloring | 20 minutes | 10-16 years | Density and buoyancy |
| Static Electricity | Balloon, wool cloth, small paper pieces | 5 minutes | 5-10 years | Static electric charge |
| Plant Growth Observation | Seeds, soil, water, sunlight | 1-2 weeks | All ages | Photosynthesis and plant biology |
Science isn’t just about reactions and forces; it’s also about understanding the complex systems that make up our natural world. These experiments encourage observation and interaction with the environment.
The Water Cycle in a Bag: Simulating Earth’s Systems
This miniature water cycle demonstrates the fundamental processes of evaporation, condensation, and precipitation.
Materials and Setup:
- Ingredients: A resealable plastic bag, water, blue food coloring (optional), tape.
- Tools: A sunny window.
A Microcosm of the Water Cycle:
This experiment recreates the Earth’s water cycle on a small scale. When the bag is taped to a sunny window, the sun’s energy heats the water at the bottom of the bag. This causes the water to evaporate, turning into water vapor (a gas). The water vapor rises and collects at the cooler top of the bag. As the water vapor cools, it condenses back into tiny liquid water droplets, forming “clouds” on the inside of the bag. When these droplets become heavy enough, they fall back down to the bottom of the bag, simulating precipitation. The blue food coloring helps to make the water more visible. This simple setup provides a tangible representation of a crucial global process, illustrating how water moves through the atmosphere, land, and oceans. It highlights the continuous nature of the water cycle and the role of solar energy in driving it.
Shadow Puppets: The Science of Light and Shadow
Shadow puppets, a timeless form of entertainment, are a direct illustration of how light travels in straight lines and how opaque objects block its path.
Materials and Setup:
- Ingredients: A light source (flashlight, lamp), a blank wall or screen, hands or cut-out shapes.
- Tools: None required beyond the ingredients.
Playing with Light:
Light travels in straight lines. When an opaque object, like a hand or a cut-out shape, is placed between a light source and a surface, it blocks the light from reaching that part of the surface. The area where the light is blocked forms a shadow. The size and shape of the shadow depend on the distance of the object from the light source and the distance of the object from the surface. Moving the object closer to the light source generally creates a larger shadow, while moving it closer to the surface creates a smaller shadow. Changing the angle of the light source also alters the shape of the shadow. This experiment is a fun and interactive way to explore the properties of light and the formation of shadows, demonstrating basic principles of optics in a playful and accessible manner. It encourages spatial reasoning and an understanding of how light interacts with the physical world.
Building a Compass: Magnetism and Earth’s Forces
This experiment allows individuals to create a simple compass, demonstrating the Earth’s magnetic field and how it can be utilized for navigation.
Materials and Setup:
- Ingredients: A sewing needle, a magnet, a small piece of cork or a leaf, a bowl of water.
- Tools: None required beyond the ingredients.
Navigating with Magnetism:
The Earth itself acts like a giant magnet, possessing a magnetic field with a north and south pole. A magnet has the property of attracting certain metals and can align itself with external magnetic fields. By magnetizing a needle, you give it magnetic properties. Stroking the needle repeatedly in the same direction with one pole of a magnet transfers some of that magnetic charge to the needle. When the magnetized needle is allowed to float freely on the water (supported by the cork or leaf), it will align itself with the Earth’s magnetic field. One end of the needle will consistently point towards magnetic north, allowing for basic directional navigation. This experiment provides a hands-on understanding of magnetism and its connection to our planet, illustrating how a simple scientific principle can be harnessed for practical purposes like navigation. It’s a foundational experiment that can lead to discussions about compasses, magnetic poles, and the vast forces that shape our world.
By engaging with these fun and accessible science experiments, individuals can unlock a deeper appreciation for the world around them. Each activity, from a bubbling volcano to a dancing raisin, offers a glimpse into the intricate workings of science, proving that learning and discovery can be an everyday adventure. The materials are simple, the concepts are fundamental, and the potential for sparking curiosity is immense. So, gather your household supplies, embrace your inner scientist, and start exploring the wonders of everyday science today.

Why Hot Water Freezes Faster Than Cold (The Mpemba Effect)
FAQs
What are some easy everyday science experiments to try at home?
Some easy everyday science experiments to try at home include making a baking soda and vinegar volcano, creating a rainbow with a glass of water and a flashlight, and making a homemade lava lamp using oil, water, and food coloring.
How can I conduct a simple experiment to learn about density?
You can conduct a simple experiment to learn about density by creating a density tower using liquids of different densities such as honey, dish soap, water, vegetable oil, and rubbing alcohol. By carefully layering these liquids in a clear container, you can observe how they stack on top of each other based on their densities.
What is a fun experiment to demonstrate the concept of chemical reactions?
A fun experiment to demonstrate the concept of chemical reactions is the classic baking soda and vinegar reaction. By mixing these two household ingredients together, you can observe a bubbling and fizzing reaction as carbon dioxide gas is produced.
How can I explore the principles of physics through simple experiments?
You can explore the principles of physics through simple experiments such as creating a homemade catapult using craft sticks and rubber bands to learn about potential and kinetic energy, or conducting a pendulum experiment using a string and a weight to observe the principles of gravity and motion.
What are some safe and educational science experiments for kids?
Some safe and educational science experiments for kids include making a homemade slime using glue and borax to learn about polymers, conducting a static electricity experiment with balloons and wool to understand electric charges, and growing crystals using household items like salt or sugar to explore crystal formation.