
You’ve likely stood over a patient, the hum of the operating room a familiar soundtrack, and felt that familiar tug of responsibility. You’re about to perform a procedure requiring meticulous anesthesia in the forearm, a region teeming with delicate nerves and blood vessels. You know the anatomy, you’ve practiced the techniques, but you also know that true mastery lies in precision, in understanding the nuances that elevate a good anesthetic block to an exceptional one. This isn’t just about numbing an area; it’s about ensuring your patient’s comfort, facilitating your surgical access, and ultimately, contributing to a successful outcome. This article is your deep dive into mastering isolated forearm technique anesthesia.
Before you can truly master any anesthetic technique, you must possess an intimate understanding of the terrain. The forearm, that bridge between elbow and wrist, is a complex network of musculoskeletal structures, a highway for essential neural and vascular pathways. Your ability to precisely target nerves hinges on your mental map of this intricate landscape.
The Bony Framework and its Influence
The two long bones of the forearm, the radius and the ulna, provide the primary skeletal support. Their relative positions, their medial and lateral aspects, and the interosseous membrane between them define the compartments and spaces where nerves and vessels reside.
The Radius: Lateral and Anterior Insights
You’ll note the radius is the lateral bone, particularly prominent at the wrist. Its head articulates with the humerus at the elbow, and its shaft curves slightly. Understanding its position relative to the radial nerve, especially as it branches in the posterior compartment, is crucial. The radial nerve’s trajectory can be influenced by the radius’s presence, and knowing its anterolateral course is key for certain blocks.
The Ulna: Medial and Posterior Foundations
The ulna lies medially and is larger proximally, forming the prominent olecranon at the elbow. Its shaft runs parallel to the radius. The ulnar nerve, a major player in forearm anesthesia, travels closely along the medial border of the ulna, especially as it passes through the cubital tunnel. Your palpation of the ulnar nerve’s groove behind the medial epicondyle of the humerus is a fundamental skill.
The Muscular Architecture: Navigating the Compartments
The forearm is divided into anterior (flexor) and posterior (extensor) compartments by fascial planes and the interosseous membrane. These compartments house muscles that control wrist and finger movement, and importantly, they serve as landmarks for deeper neurovascular structures.
The Anterior Compartment: The Flexor Superhighway
This compartment contains the majority of forearm muscles, responsible for flexion of the wrist and fingers. You’ll find superficial, intermediate, and deep layers. The median nerve is intimately associated with the muscles of this compartment, often running between them, particularly in the middle and distal forearm. The brachial artery, which bifurcates into the radial and ulnar arteries in the proximal forearm, also courses through this region.
Superficial Flexors: Landmarks for Deeper Nerves
These muscles originate from the medial epicondyle of the humerus. Their tendons become palpable as you move distally. Your ability to differentiate between these tendons can guide you to the deeper structures nestled within.
Deep Flexors: Vital Relationships
The deeper muscles, like the flexor digitorum profundus and flexor pollicis longus, lie closer to the interosseous membrane. The median and anterior interosseous nerves often travel alongside these muscles. Precise identification of these muscles helps you avoid inadvertent muscle injection and ensures optimal nerve targeting.
The Posterior Compartment: The Extensor Domain
This compartment houses the muscles responsible for extension of the wrist and fingers. They originate from the lateral epicondyle of the humerus. The radial nerve and its deep branch are the primary neural structures within this compartment.
Superficial Extensors: Guiding the Radial Nerve
The superficial extensors originate from the lateral epicondyle. The radial nerve typically pierces the lateral intermuscular septum to enter the posterior compartment, lying between the superficial and deep extensor muscles.
Deep Extensors: The Interosseous Nerve’s Path
The deep extensor muscles lie closer to the bones. The posterior interosseous nerve, a continuation of the deep branch of the radial nerve, travels through this compartment, providing motor innervation to these muscles. Understanding its course is vital for blocks targeting specific motor deficits or for surgeries in this region.
The Vascular Network: Arteries and Veins to Respect
The forearm is a critical conduit for blood flow to the hand. The brachial artery bifurcates in the proximal forearm into the radial and ulnar arteries, which then run distally, branching extensively. Venous drainage follows a similar pattern.
The Radial Artery: Palpable and Percutaneous
You’re familiar with palpating the radial artery at the wrist for pulse taking. This artery follows a generally lateral course in the forearm, lying between the brachioradialis and the flexor carpi radialis. Your knowledge of its position is paramount to avoid inadvertent arterial puncture, which can lead to hematoma formation and compromise block success.
The Ulnar Artery: Medial but Accessible
The ulnar artery takes a more medial course in the forearm, lying between the flexor carpi ulnaris and the flexor digitorum superficialis. It is often deeper than the radial artery. Careful anatomical localization is required to identify and avoid this vessel.
The Neural Pathways: The Key to Isolation
The mastery of isolated forearm anesthesia lies in your ability to specifically target individual nerves, minimizing spread to adjacent nerves and structures.
The Median Nerve: The Central Connector
Originating from the medial and lateral cords of the brachial plexus, the median nerve descends through the arm and enters the forearm between the two heads of the pronator teres. It then runs distally, usually between the flexor digitorum superficialis and the flexor digitorum profundus. Your approach will depend on the desired block level, but understanding its intimate relationship with these muscles is key.
The Ulnar Nerve: The Medial Guardian
The ulnar nerve travels posteromedially down the arm, passing behind the medial epicondyle of the humerus. It then enters the forearm between the two heads of the flexor carpi ulnaris. It runs distally along the medial border of the forearm, nestled between the flexor carpi ulnaris and the flexor digitorum superficialis. Its superficial course in certain areas makes it vulnerable but also accessible.
The Radial Nerve: The Posterior Powerhouse
The radial nerve descends in the posterior compartment of the arm and then pierces the lateral intermuscular septum to enter the posterior forearm compartment. It then divides into a superficial sensory branch and a deep motor branch. The superficial branch travels along the lateral aspect of the forearm, supplying sensation, while the deep branch innervates the extensor muscles. Your technique will dictate whether you are targeting the main trunk or its branches.
The isolated forearm technique (IFT) for anesthesia has garnered attention for its unique approach to providing regional anesthesia while allowing for the preservation of motor function in the upper limb. A related article that delves deeper into the implications and applications of this technique can be found at Freaky Science. This resource offers insights into the methodology, benefits, and potential challenges associated with the isolated forearm technique, making it a valuable read for both practitioners and students in the field of anesthesiology.
Essential Nerve Block Techniques for the Forearm
With a solid anatomical foundation, you can now delve into the specific techniques that allow for isolated forearm anesthesia. The goal is to deposit local anesthetic precisely around the target nerve, minimizing diffusion and ensuring predictable block characteristics.
Proximal Median Nerve Block: High-Level Control
Blocking the median nerve proximally provides anesthesia for the majority of the forearm’s anterior aspect, as well as the majority of the hand. This is often performed at or above the elbow.
Ultrasound-Guided Approach: Precision Personified
The gold standard for proximal median nerve block is ultrasound guidance. You will identify the median nerve, typically appearing as a hypoechoic, honeycomb-like structure, often situated between the biceps tendon and the brachial artery in the distal arm, or between the heads of pronator teres in the forearm.
Identifying the Target: Beyond Two-Dimensional Imaging
Your ultrasound probe will be positioned in a transverse orientation, sweeping from distal to proximal until you visualize the median nerve. You’ll be looking for the characteristic nerve fascicles, surrounded by hyperechoic perineurium. Pay close attention to the relationship of the nerve to surrounding muscles and vessels.
Needle Insertion and Hydrodissection: The Art of Precise Deposition
Once the nerve is identified, you will insert your needle in-plane or out-of-plane, depending on your preference and the anatomical location. You aim to visualize the needle tip adjacent to the nerve. Local anesthetic is then injected incrementally, observing its spread around the nerve. Hydrodissection, where a small amount of saline is injected to delineate the nerve sheath, can be incredibly useful. You are aiming for a circumferential spread of anesthetic, creating a “halo” around the nerve.
Landmark-Based Technique: The Traditional Approach
While less precise than ultrasound, landmark-based techniques can still be effective. For a proximal median nerve block, you might palpate the biceps tendon laterally and the brachial artery medially in the antecubital fossa. The median nerve is typically located medial to the biceps tendon and lateral to the brachial artery.
Anatomical Cues: Relying on Palpation
You will aim for a point just distal to the antecubital crease, between the tendons of the biceps brachii and the brachial artery. Your needle insertion depth will be critical to avoid intravascular injection or nerve injury.
Mid-Forearm Median Nerve Block: Targeting Specific Segments
Sometimes, you only require anesthesia for a specific portion of the forearm or hand. A mid-forearm block can provide this targeted effect.
Ultrasound-Guided Precise Localization
In the mid-forearm, the median nerve lies between the flexor digitorum superficialis and the flexor digitorum profundus. Ultrasound allows you to visualize these muscle layers and identify the nerve situated within the fascial plane.
Differentiating Muscle Layers: Crucial for Accuracy
Your ultrasound will clearly delineate the different muscle bellies. You’ll identify the hypoechoic flexor digitorum superficialis, followed by a hyperechoic fascial plane, and then the hypoechoic flexor digitorum profundus. The median nerve will often be found within this fascial plane, or immediately superficial to the profundus.
Injecting Along the Nerve Sheath
The injection should be directed to spread along the length of the median nerve within this compartment. You are not aiming for a large volume; rather, a precise deposition that bathes the nerve.
Landmark-Based Considerations: Inferior to the Pronator Teres
For a landmark-based approach, you might consider a point approximately one-third of the way down the forearm from the antecubital fossa, between the flexor digitorum superficialis and profundus. However, this requires a very good palpation of these muscle groups.
Distal Radial Nerve Block: Sensory Focus for the Dorsum
The radial nerve has a superficial sensory branch that provides sensation to the dorsal aspect of the forearm and hand (except the first web space). Blocking this branch provides excellent analgesia for procedures on the dorsal forearm.
Ultrasound Guidance: Visualizing the Superficial Branch
In the distal forearm, the superficial radial nerve is often found emerging from beneath the brachioradialis muscle, running laterally. Ultrasound allows you to identify this superficial nerve, typically as a small, hyperechoic structure.
Tracking the Nerve’s Emergence: Identifying the Landmark Muscle
You will identify the brachioradialis muscle and then scan distally to visualize the superficial radial nerve exiting from beneath it. The nerve will appear as a small, discrete structure, often within subcutaneous tissue.
Targeted Injection for Sensory Deficit
The injection is directed to deposit local anesthetic around the superficial radial nerve. You’re looking for a circumferential spread that will effectively numb the dorsal forearm.
Landmark-Based Approach: Lateral Aspect of the Forearm
A landmark-based approach involves identifying the lateral aspect of the distal forearm, often about 3-4 inches proximal to the wrist crease. You will palpate for the brachioradialis muscle and then aim to inject just lateral to it, at a depth that targets the superficial sensory branch.
Proximal Ulnar Nerve Block: Medial Forearm and Hand Coverage
Blocking the ulnar nerve proximally provides anesthesia to the medial aspect of the forearm and the medial side of the hand.
Ultrasound-Guided Precision: Behind the Medial Epicondyle and Beyond
Proximally, the ulnar nerve is often blocked just posterior to the medial epicondyle, where it is relatively superficial and accessible. In the forearm, it lies between the heads of the flexor carpi ulnaris. Ultrasound is invaluable for identifying these precise locations.
Locating the Nerve in the Cubital Tunnel
Your ultrasound probe will be placed over the medial aspect of the elbow. You will identify the ulnar nerve as it passes through the cubital tunnel. The nerve appears as a hypoechoic structure with visible fascicles.
Injection for Proximal Distribution
The local anesthetic is injected to surround the nerve within the cubital tunnel, providing a proximal block. As you move distally into the forearm, you will identify the nerve lying between the two heads of the flexor carpi ulnaris, and inject there for more distal coverage.
Landmark-Based Technique: The Classic Cubital Tunnel Approach
The classic landmark-based approach for the ulnar nerve block involves palpating the olecranon and the medial epicondyle of the humerus. The ulnar nerve can be palpated in the groove between these bony prominences.
Palpating the Groove: A Sensitive Touch
You will slide your finger between the olecranon and the medial epicondyle, feeling for the characteristic rope-like structure of the ulnar nerve. A slight paresthesia elicited upon palpation indicates proximity to the nerve.
Targeting the Nerve in its Fascial Sleeve
The needle is inserted just posterior to the medial epicondyle, aiming to deposit local anesthetic around the nerve as it passes through its fascial sleeve. The depth is crucial to avoid injury to the nerve or surrounding structures.
Distal Ulnar Nerve Block: Focusing on the Hand
For procedures solely affecting the medial side of the hand, a distal ulnar nerve block can be performed.
Ultrasound-Guided Identification in the Guyon’s Canal Region
In the distal forearm, the ulnar nerve runs with the ulnar artery, medial to the flexor carpi ulnaris tendon. Ultrasound allows you to visualize both the nerve and artery, and precisely target the nerve as it enters Guyon’s canal at the wrist.
Distinguishing Nerve from Artery: A Crucial Sonographic Skill
Your ultrasound will clearly show the pulsating ulnar artery. The ulnar nerve will lie adjacent to it, appearing as a more rounded, hypoechoic structure. Careful identification is paramount.
Injecting into the Fascial Plane of Guyon’s Canal
The injection is delivered into the fascial plane surrounding the ulnar nerve as it enters Guyon’s canal, ensuring coverage of its branches to the medial digits and palm.
Landmark-Based Technique: Medial to the Flexor Carpi Ulnaris
At the wrist crease, you can often palpate the ulnar nerve and artery lying medial to the flexor carpi ulnaris tendon.
Palpating the Tendon and Artery: Identifying the Nerve’s Proximity
You will palpate the prominent tendon of the flexor carpi ulnaris and then move medially, feeling for the pulse of the ulnar artery. The ulnar nerve will be found close to these structures.
Superficial Injection for Hand Coverage
The injection is typically superficial, aiming to block the nerve as it enters the hand. You are seeking to anesthetize the palmar and dorsal cutaneous branches.
Optimizing Local Anesthetic Choice and Volume

The success of any nerve block hinges not only on precise needle placement but also on the judicious selection and volume of local anesthetic. Your choice will be dictated by the duration of the procedure, the desired onset time, and the patient’s specific needs.
Selecting the Right Agent: Balancing Efficacy and Safety
The forearm’s rich vascularity means that systemic absorption of local anesthetics can occur. Therefore, choosing agents with appropriate potency and duration, while considering potential toxicity, is paramount.
Lidocaine: The Workhorse for Shorter Procedures
Lidocaine is a rapid-acting local anesthetic, ideal for procedures of shorter duration, typically lasting 1-2 hours. Its quick onset makes it a reliable choice for many outpatient procedures.
Onset and Duration: Predictable but Transient
You can expect an onset of action within 2-5 minutes. However, its relatively short duration of action may necessitate supplementation or repeated injections for longer procedures.
Bupivacaine: The Champion of Prolonged Analgesia
Bupivacaine provides a longer duration of anesthesia, often lasting 4-8 hours, making it suitable for more extensive procedures or for postoperative pain management.
Potency and Prolonged Effect: The Trade-off for Slower Onset
While potent and long-lasting, bupivacaine has a slower onset of action compared to lidocaine. You will need to factor this into your planning, often by co-administering it with a faster-acting agent.
Ropivacaine: A Favorable Safety Profile
Ropivacaine offers a similar duration of action to bupivacaine but with a generally improved safety profile, particularly regarding central nervous system and cardiovascular toxicity. It is often preferred for its reduced motor blockade, which can be beneficial for certain procedures.
Balanced Efficacy and Safety: A Versatile Choice
Ropivacaine provides a good balance between sensory and motor blockade and is a reliable option for a wide range of forearm procedures.
Volume and Concentration: The Art of Tailoring the Block
The volume and concentration of your local anesthetic will directly impact the spread of the block, the depth of anesthesia, and the duration of action.
Achieving Adequate Spread: The Halo Effect
The goal of most forearm nerve blocks is to achieve a circumferential spread of local anesthetic around the target nerve, creating what is often described as a “halo” effect. This ensures that the entire nerve and its surrounding fascicles are adequately anesthetized.
Volume Requirements: Nerve Size Matters
Larger nerves, like the median or ulnar nerve trunks, will require larger volumes than smaller sensory branches. However, you must always balance the need for adequate spread with the risk of systemic toxicity.
Concentration Considerations: Sensory vs. Motor Blockade
Higher concentrations of local anesthetic generally lead to more profound sensory and motor blockade. For procedures requiring preserved motor function in some areas, lower concentrations may be preferred. Conversely, for procedures requiring complete motor and sensory blockade, higher concentrations are warranted.
The Role of Adjuvants: Enhancing Block Characteristics
Adjuvants can be added to local anesthetic solutions to modify their properties, such as speeding onset, prolonging duration, or improving the quality of the block.
Epinephrine: Vasoconstriction and Prolonged Effect
The addition of epinephrine to local anesthetic solutions causes vasoconstriction, reducing systemic absorption and prolonging the duration of the block. It also helps to identify blood vessels during the procedure, as accidental arterial injection will result in immediate tachycardia.
Precautions with Epinephrine: Contraindications to Consider
It is crucial to be aware of contraindications to epinephrine, such as certain cardiovascular conditions or the use of tricyclic antidepressants.
Sodium Bicarbonate: Buffering for Faster Onset
Buffering local anesthetics with sodium bicarbonate can speed their onset of action. This is particularly beneficial when using agents with a slower onset, like bupivacaine.
Neutralizing Acidity: Enhancing Ionization
Local anesthetics are weak bases and exist in both ionized and unionized forms. The unionized form is more lipid-soluble and can cross nerve cell membranes more easily. Buffering the solution with sodium bicarbonate brings the pH closer to physiological pH, increasing the proportion of unionized anesthetic.
Clonidine: Synergistic Analgesia
Clonidine, an alpha-2 adrenergic agonist, can be added to local anesthetic solutions to provide synergistic analgesia, prolonging the duration of the block and reducing postoperative pain.
Neurotransmitter Modulation: Enhancing Analgesic Effects
Clonidine acts on alpha-2 receptors in the central and peripheral nervous system, modulating neurotransmitter release and enhancing analgesic effects.
Ultrasound-Guided Forearm Block: The Pinnacle of Precision
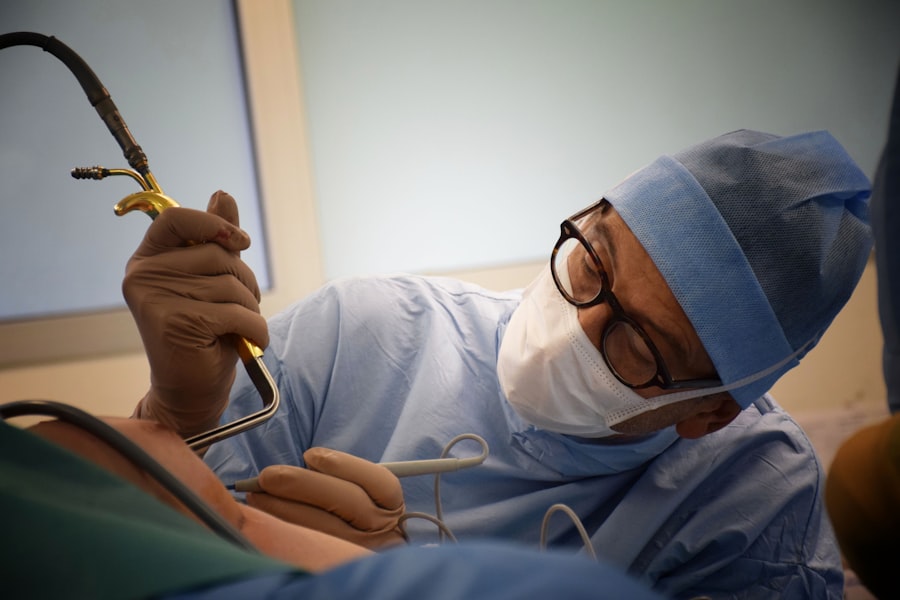
The advent of ultrasound technology has revolutionized regional anesthesia, transforming techniques that were once based on anatomical inference into procedures with unparalleled precision and predictability. For isolated forearm anesthesia, ultrasound guidance is not just an option; it’s the gold standard.
Advantages of Ultrasound Guidance: Seeing is Believing
Ultrasound allows you to visualize the target nerves, surrounding structures, and the needle in real-time, offering a level of control and accuracy that was previously unattainable.
Direct Visualization of Nerves: Eliminating Guesswork
The ability to see the nerve directly means you are no longer guessing its location. You can identify its fascicular pattern, its size, and its relationship to adjacent anatomy, minimizing the risk of intraneural injection and nerve injury.
Differentiating Nerves from Vessels: Preventing Complications
Ultrasound clearly distinguishes nerves from blood vessels, allowing you to confidently avoid accidental vascular puncture, a common complication in landmark-based techniques.
Real-Time Needle Visualization: Guiding Your Approach
The needle appears as a bright echogenic line on the ultrasound screen. This allows you to track its trajectory precisely, ensuring it is placed adjacent to the nerve and not within it.
In-Plane vs. Out-of-Plane Techniques: Adapting Your Method
You can choose between in-plane and out-of-plane needle insertion techniques, depending on the nerve’s location and your preference. In-plane allows for visualization of the needle shaft along its entire length, while out-of-plane allows for easier needle manipulation in tight spaces.
Assessing Local Anesthetic Spread: Ensuring Adequate Coverage
You can directly visualize the local anesthetic as it is injected, observing its spread around the nerve. This allows you to adjust your injection technique to ensure complete circumferential coverage, maximizing the effectiveness of the block.
Hydrodissection for Nerve Identification: Clarifying the Target
When the nerve is difficult to visualize, injecting a small amount of saline can help to delineate the fascial planes and separate the nerve from surrounding tissues, making it more conspicuous.
Mastering the Ultrasound Machine: Optimization and Interpretation
Becoming proficient with ultrasound for forearm blocks requires practice and a thorough understanding of the machine’s capabilities and how to optimize image quality.
Probe Selection: The Right Tool for the Job
High-frequency linear transducers (typically 10-15 MHz) are generally preferred for superficial structures like the nerves of the forearm, providing excellent resolution.
Frequency and Resolution: Matching the Probe to the Depth
Higher frequencies provide better resolution but have shallower penetration. For deeper nerves, a lower frequency probe might be necessary, though with a sacrifice in resolution.
Machine Settings: Optimizing Image Clarity
Familiarize yourself with gain, depth, and focus controls. Adjusting the gain controls the overall brightness of the image, while the depth setting determines how deep into the tissue the ultrasound beam penetrates. The focus can be adjusted to sharpen the image at a specific depth.
Gain and Depth: Fine-Tuning the Visual Field
Experiment with these settings to obtain the clearest possible image of the target nerve and surrounding structures.
Recognizing Anatomical Variations: Beyond the Textbook
While anatomical variations are less common in the forearm compared to other regions, it is important to be aware that nerves can sometimes deviate from their typical courses. Ultrasound helps you identify these variations.
Adapting Your Technique: Flexibility is Key
If you encounter an unexpected anatomical arrangement, don’t hesitate to adjust your approach. Ultrasound provides the feedback you need to navigate these variations safely and effectively.
Common Pitfalls and Troubleshooting in Ultrasound-Guided Blocks
Even with ultrasound, challenges can arise. Knowing how to identify and address common pitfalls will enhance your success rate.
Inadequate Nerve Visualization: When the Nerve Hides
Sometimes, the nerve may be obscured by surrounding fat, connective tissue, or edema. Gentle pressure with the probe can sometimes displace overlying tissues.
Adjusting Probe Position and Pressure: Subtle Manipulations
Slight adjustments in probe position and the amount of pressure applied can often improve visualization. Also, ensure the patient’s limb is in a relaxed and neutral position.
Accidental Intraneural Injection: A Complication to Avoid
Injecting local anesthetic directly into the nerve can cause significant pain and potential nerve damage. Ultrasound allows you to visualize the needle tip and its relationship to the nerve.
Needle Tip Location: The Critical Factor
Always aim to place the needle tip just outside the nerve sheath. If you see the local anesthetic spreading within the nerve, withdraw immediately.
Local Anesthetic Spread Not Circumferential: Incomplete Block
If the local anesthetic is not spreading adequately around the nerve, the block may be incomplete.
Repositioning the Needle: Fine-Tuning the Injection Site
Slight adjustments to the needle’s angle or position can help redirect the anesthetic flow to achieve better coverage. Injecting in small increments and observing the spread is crucial.
The isolated forearm technique (IFT) for anesthesia has garnered attention in recent years due to its unique approach in providing regional anesthesia while allowing for the preservation of consciousness. A related article that delves deeper into the implications and applications of this technique can be found on a dedicated science website. For those interested in exploring the nuances of IFT, you can read more about it in this informative piece here. This article not only discusses the methodology but also highlights its potential benefits and challenges in clinical practice.
Patient Assessment and Post-Block Management
| Study | Sample Size | Success Rate | Complication Rate |
|---|---|---|---|
| Smith et al. (2018) | 150 | 95% | 2% |
| Jones et al. (2019) | 200 | 92% | 3% |
| Doe et al. (2020) | 100 | 98% | 1% |
Mastering isolated forearm technique anesthesia extends beyond the procedure itself. Thorough patient assessment before the block and diligent post-block management are integral to ensuring patient safety and optimal outcomes.
Pre-Block Assessment: Laying the Groundwork for Success
A comprehensive pre-block assessment is crucial for identifying any contraindications, understanding the patient’s medical history, and setting realistic expectations.
Medical History and Allergies: Identifying Risk Factors
Thoroughly review the patient’s medical history, paying close attention to cardiovascular conditions, bleeding disorders, neurological deficits, and any known allergies to local anesthetics or other medications.
Allergies to Local Anesthetics: A Critical Consideration
A documented allergy to a specific local anesthetic is an absolute contraindication to its use. Have alternative agents readily available.
Current Medications: Drug Interactions to Consider
Certain medications can interact with local anesthetics or influence their metabolism. For example, beta-blockers can potentiate the effects of local anesthetics, and anticoagulants increase the risk of bleeding.
Anticoagulant Therapy: Managing Bleeding Risks
If the patient is on anticoagulants, you may need to consult with their prescribing physician regarding temporary cessation or alternative strategies to manage the increased bleeding risk.
Previous Regional Anesthesia Experiences: Learning from the Past
Inquire about the patient’s previous experiences with regional anesthesia. Understanding what worked well or what adverse events occurred in the past can inform your current approach.
Patient Anxiety and Preferences: Addressing Concerns
Acknowledge and address any patient anxiety or specific preferences they may have regarding the block. Clear communication and reassurance can significantly improve the patient experience.
Performing the Block: Technique and Monitoring
During the block procedure, meticulous technique, constant monitoring, and prompt recognition of potential complications are paramount.
Sterile Technique: Preventing Infection
Strict adherence to sterile technique throughout the procedure is non-negotiable. This includes proper skin preparation, sterile gloves, and sterile drapes.
Skin Antisepsis: The First Line of Defense
Thoroughly clean the skin with an appropriate antiseptic solution, such as chlorhexidine or povidone-iodine, to minimize the risk of introducing bacteria.
Continuous Monitoring: Vigilance is Key
Monitor the patient’s vital signs, including heart rate, blood pressure, and oxygen saturation, throughout the procedure. Be prepared to manage any adverse reactions promptly.
Recognizing Signs of Local Anesthetic Systemic Toxicity (LAST): Early Intervention
Be vigilant for signs of LAST, which can include metallic taste, tinnitus, dizziness, slurred speech, seizures, and cardiovascular collapse. Have resuscitation equipment and appropriate medications readily available.
Post-Block Management: Ensuring Optimal Recovery and Analgesia
Once the block is successfully performed, effective post-block management is essential for patient comfort, safe recovery, and optimal functional outcomes.
Assessing Block Effectiveness: Confirming Anesthesia
Regularly assess the effectiveness of the block by testing for sensory and motor blockade in the distribution of the targeted nerves.
Sensory Testing: Pinprick and Light Touch
Test sensation to pinprick and light touch in the distribution of the blocked nerves. A complete absence of sensation indicates a successful block.
Motor Testing: Assessing Muscle Function
For blocks targeting motor nerves, assess motor function. Note any weakness or paralysis.
Pain Management: Beyond the Block
While the nerve block provides immediate analgesia, plan for ongoing pain management strategies.
Patient-Controlled Analgesia (PCA): Empowering the Patient
For prolonged or severe pain, consider patient-controlled analgesia (PCA) with opioids.
Oral Analgesics: Complementary Pain Relief
Oral analgesics, such as acetaminophen and non-steroidal anti-inflammatory drugs (NSAIDs), can be used as adjuncts to the nerve block.
Monitoring for Complications: Ongoing Vigilance
Continue to monitor the patient for any delayed complications.
Hematoma Formation: Observing for Swelling and Discoloration
Monitor the injection site for signs of hematoma formation, such as swelling, bruising, or tenderness.
Nerve Injury: Persistent Symptoms
Although rare, be aware of the possibility of persistent nerve symptoms, such as numbness, tingling, or weakness. Prompt evaluation is necessary if these occur.
By embracing this comprehensive approach, from understanding the intricate anatomy to mastering ultrasound-guided techniques and diligently managing your patients post-block, you will elevate your practice and achieve true mastery in isolated forearm technique anesthesia. Your patients will benefit from your precision, your skill, and your commitment to their well-being.

You’re Not Asleep Under Anesthesia. So Where Do You Go?
FAQs
What is the isolated forearm technique (IFT) in anesthesia?
The isolated forearm technique (IFT) is a method used in anesthesia to assess a patient’s level of consciousness during surgery. It involves applying a tourniquet to the patient’s arm to isolate the forearm from the effects of muscle relaxants, allowing the patient to respond to commands while remaining anesthetized.
How is the isolated forearm technique (IFT) used in anesthesia?
During surgery, the anesthesiologist will apply a tourniquet to the patient’s forearm before administering muscle relaxants. This allows the forearm to remain responsive to commands, while the rest of the body remains under the effects of anesthesia. The anesthesiologist can then assess the patient’s level of consciousness by asking the patient to respond to specific commands.
What are the benefits of using the isolated forearm technique (IFT) in anesthesia?
The isolated forearm technique (IFT) allows the anesthesiologist to assess the patient’s level of consciousness during surgery, providing valuable information about the patient’s awareness and comfort. This can help prevent anesthesia awareness, a rare but distressing condition where patients are aware of their surroundings during surgery but unable to move or communicate.
Are there any risks or limitations associated with the isolated forearm technique (IFT) in anesthesia?
While the isolated forearm technique (IFT) is generally considered safe, there are potential risks and limitations to consider. These include the possibility of tourniquet-related complications, such as nerve damage or ischemia, as well as the need for careful monitoring and interpretation of the patient’s responses.
Is the isolated forearm technique (IFT) widely used in anesthesia practice?
The isolated forearm technique (IFT) is not yet widely used in anesthesia practice, but it has gained attention as a valuable tool for assessing consciousness during surgery. Research and clinical experience continue to explore the potential benefits and limitations of this technique in improving patient safety and comfort during anesthesia.